Friday, December 5, 2008

kim's clever transfers title goes here!


For this weeks challenge, I’m going to shake it up a bit! This isn’t going to be so much a photo tutorial, but a way that you can play with your photos after you’ve taken them. I want you all to get a bit funky and messy with it this week!

So- the inspiration is torn and weathered posters or billboards. Are you familiar with an artist called Mimmo Rotella? His work was celebrated throughout the 60’s until today, for his fresh approach to street-art and his simple- but effective collages.


I love the rips and tears that are created, having another layer peeking in from behind it- so I did a little searching and asking around, and I found this really easy way to Transfer your photos onto a different background- that gets some really cool effects!

Do you remember this journal page I did over the summer?


This is transfermagiclove. Want some of that magic? Get your stuff together and we’ll start groovin’!

What you’ll need;

-Liquid glue of some kind- I use PVA, but anything that you can mix with water and that is sticky. (this should also work with solvents)
-A big paintbrush (the thicker and stronger the bristles are- the better).
-A workspace covered with newspaper.
-A cup of Water, and a mixing surface (like, greaseproof paper or a plastic plate or palette).
-A ‘rubbing’ tool (a bone folder, popsicle stick, back of spoon…).
-An Ink-Jet printed picture. (one from a home printer- you need to make sure the ink can come off. A quick test to make sure is, put a drop of water on it, if it bleeds and smudges you’ve got the right kind!)
- Some coloured papers.

For the Picture- you really want something in Black And White to start off with- something with high contrast too, remember, the WHITE areas will probably end up being the colour of your background paper. I like to print off several small images of the same picture- to play with, smaller is good, like 4-6 inches on either side. Because you are going to be placing the image face down, flipping (reversing) the photo in Photoshop will give you the right on the right side at the end. Image> Rotate Canvas> Flip Canvas Horizontal

An important thing to remember is that this is going to be MESSY! And I seriously mean this- you will probably end up with glue and bit of paper in your hair! So roll those sleeves up! And it takes a few practices so don’t do it straight on your page which you’ve spent hours making (trust me!).

1. Cut out your picture- separate it from any other printed image, I like to leave a little white boarder.
2. Pick your paper- brown, yellow, and lined are my favourites, but most colours work well. Start with something light. Cut it to the size you want- so your picture will fit on it.
3. Pour some glue onto your mixing surface and get a paintbrush full of it!
4. Apply the glue to the area where your transfer will be. Put a little bit of water on your brush and rub the heck out of that area on your coloured paper. The more you rub, the more the fibres of the paper can relax.
5. Rub that glue in a little bit more.
6. Put your picture FACE DOWN onto that gluey mess that is your coloured paper.
7. Get your brush wet with water and paint the back of the picture with this. Some of the ink should be seeping into the white of the paper you printed it on.
8. Rub the back of the picture with your paintbrush. Add a bit of glue if it gets too wet- but don’t go overboard!
9. Put your brush down and assess the situation.

Is your paper really soggy? If yes- let it sit for a while and try another one, this time with less water. If no- keep reading.

Is your paper sticky and kind of dry? If Yes- you are on the right track! Add a bit more water and try rubbing the back with your rubbing tool- be careful not to rip the picture in awkward places! If No- keep reading.

Is your paper slightly wet but kind of sticky? If Yes- yay! See step 10. If No- keep reading.

Has all the rubbing that you’ve just done created little rolled up bits of paper or clumps of paper coming off of your picture? If Yes- don’t panic! This is fine. See Step 10.

Does your paper look like you’ve put it through the dishwasher? If Yes- try again!

10. Try peeling back the corner of your picture away from the paper and see what’s happened.

All the colour has leaked and it’s a purple/black blob of watery messy-ness! Oh dear- don’t fret. Check another corner, if the same this occurs, set aside and let to dry a little bit more.

The picture ripped! That’s cool- does it look neat? You may have actually adhered some of your picture to the paper. Try ripping it more, from another corner- is there anything left behind on the coloured paper? If you aren’t happy try rubbing the back more, getting it wetter and seeing if it will pull off easier.

The picture lifts off easily and there isn’t anything on the paper! Ut-oh! Did you do Step 4 and 5? Is your image the right kind of printed photograph?

The picture lifts off easily and there is ink on the paper! WOO! Be careful that the ink isn’t really watery and will run everywhere. If you don’t like it- try repeating steps 4-9.

11. You should now try and pull back the picture. Try ripping it- leaving parts of the picture on the paper.
12. Take a look- does it look nice? Try another one, try something a bit different. Sometimes the picture looks nicer than the transfer.
13. Let it dry.

I find that this is best done with friends. Invite someone over and tell them you’re going to play glue and paper and getting messy. It’s really fun to teach someone too because every transfer is different and the more you do it- the more you’ll find out what works best for you. So PLAY! I will be replying to any questions you have via the comments in this post- don’t hesitate to ask!

Here are some examples of successes and little mess-ups that I’ve grown to love.


Try and incorporate it into a scrappage or a journal entry. I’ve often found this very difficult because you’ve just ‘ruined’ your picture, but it can have really nice effects! Try sticking one through your friend’s door with a little note on the back, ring the doorbell and run! Mail one to your husband’s work for something to put up in the office. Try using one as a postcard (after all, it’s already ripped).

For this challenge I wanted to use one in a scrappage so I transfered straight onto a 12x12 piece of cardstock and added stuff around it. I wanted to keep it simple too.


We also have an AWESOME girl as guest designer this week! She rocks out the messy-gorgeousness and we are so happy to have her play along, If you don’t know her- wave a happy hand at Christina!

"Well hello there. My name is Christina, though some people know me as the girl who likes coffee way too much. :D
Besides scrapping and playing with mixed media projects, I love photography and have recently become an avid camera collector, particularly of vintage polaroid cameras and TLRs whch are used for TTV (or through the viewfinder) style photography. I live in Seattle (land of coffee) and work for Starbucks (are you seeing a trend here?). I also have a cute boyfriend who has been with me for almost ten years.

I am so delighted to be playing along with this Work Your Soul challenge.

As I write this, my hands are covered in glue and paper bits, This was a very fun technique to try, but it took me a few times to get the hang of it. And along the way I learned some very valuable lessons.

One. This site is awesome inspiration/eye candy and Kim and Jen are super nice chicas.

Two. If you use PVA, wait for it to dry. No really. Working with glue and water as adhesives when doing collage is tricky and if you do it wrong, you could end up with your photo transfer stuck to your hair, and then possibly your face. (True Story)

Three Be prepared for your printout to do weird things. You might see black, but it could give you pink, or purple when it gets wet. It's an adventure, like all good projects. Have fun."


ohhhh. How nice is that! Yumyum!

(OH MY GOSH THIS IS AMAZING:)
Jen's photo transfer mini book...


I used a paper shopping bag + other found papers and Modge Podge as my glue, just because that's what I happened to find around the house! I used both black and white and color photos and got some really interesting effects. I love how the photos look after they've ripped and gotten stuck in places. I could happily play with this technique for hours. :)

This is my expression everytime one of you guys share with us what you’ve made;

so- thank you for putting a smile on my face!

All right, Soulies, you know what to do! Post links to your take on this challenge here or in our Flickr group by December 18th.

The winner will receive an awesome vintage holiday mini book (made from an old cover of a book, vintage lace, trims, sheet music, and all sorts of cool papers) from The Artsy Cottage on Etsy! Very cool.

And our winner from our last fun challenge is.....
Julie- you took the design from your finds and put it on your page really well!
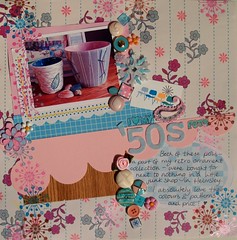
congrats!
Email your name and mailing address to jgeigley [at!] gmail.com for your prize pack.

Friday, November 21, 2008

and now for something a bit more domesticated


This week, our inspiration comes from retro patterns on dishes. Pots, pans, coffee cups, casseroles, plates, dishes, caraffes, juice glasses ... you name it. Anything with a funky pattern, crazy colors or bit of nostalgia will do. I love looking through thrift stores at the old dishes and have always wanted to incorporate them somehow into scrapbooking.

The challenge is simple and there are so many ways to interpret it. Just use a dish pattern on a scrap page or journal entry somehow.

*Scan an old plate, print the image out on paper and cut it out or use the whole thing as a background for a journal or scrap page.

*Draw or paint the pattern on a piece of paper.

*It might be cool to tell the story of where it came from, who used it – if it was your mom's or grandma's or had any sort of story in your family.

*If you have a collection of a certain pattern, you can write about that.

*Or just use it as a visual element if you just like the pattern and bought it at a thrift store.

And now we'd like to introduce our lovely Guest Designer for this challenge...


The most fabulous Patty Zimmerman, a.k.a. "coloredsprinkles." We are so excited to have her! She is the creator of the challenge blog The Creative Type which celebrates the love of all things typography. And she absolutely amazes us with her colorful textures, layers and rad illustrations. You can't help but love this girl... we certainly can't. So here she is!

"Hello, hello!! So glad to have been asked to guest design for Work your Soul. I think I can really relate to this challenge. Growing up my parents had these dishes from Pyrex which had small tiny green flowers around the rims of the plates, mugs, bowls, even butter dishes. Back then I thought our family was the only one who had this pattern; little did I know that as I grew older I found that pattern everywhere. Such is the wonders of Pyrex and all of the retro, funky, colorful designs they put out. It's funny to think how all of that is back in style now, flooding ETSY shops and Ebay, who could not love it. As for me, I have a huge passion for doodling and coming up with designs in my sketchpad, so this was totally up my alley. I decided to find two patterns that related to an Autumn theme (gotta love this time of year) and really work them into a colorful, fallish layout using a favorite fire pit photo of mine. I don't know about you, but sitting in front of a fire and adoring all of its colors is really a beautiful experience. And lets not forget about the colors, I really wanted to show that throughout my layout, allowing the two designs to take the lead. I mean, who wouldn't love to have a dish with little blue and green trees on it?? Well I would, but instead I will settle for it on my layout for now:) Thank you Jen and Kim for allowing me to share my take on your retro dish design prompt, I just knew I had to do something with my childhood memories of Pyrex!"


Lyrics from Bjork's "Unison" ... 'One hand allows the other, so much and me. Born stubborn me will always be. Before you count, one two three. I will have grown my own private branch of this tree.'


(Check out Patty's fun illustrations. So inspiring!)

Here is KIM'S AWESOMENESS!


I've been collecting some plates and kitchenware for university, because i don't want to show up with IKEA things like everyone else- so i've been looking in thrift stores and vintage shops and i've found some really great deals! I've got a whole tea-cup and sauser set, plus some plates and a milk jug. But my newest findd was this coffee maker from the 60's! and it works!

i wanted to take a lo-fi picture of the actual coffeemaker to give it some mystery, and i wanted to show-case the design at the same time- so i just water-coloured it onto the background, then traced over it with black pen! so much fun!
(Gorgeous job!)

And Jen's project:

I used the lotus pattern by Grete Prytz Kittelsen for Cathrineholm as my inspiration. (Here's a photo of Grete, just for fun – she just looks like a pretty neat lady if you ask me. Photo from www.dagbladet.no)

I fell in love with this design when I saw it a few years ago at my local thrift shops.

I'm just drawn to the clean look, bright colors, and cool shapes.

And you may or may not know that my daughter's name is Lotus, so it's interesting that I was a fan of these dishes before I knew it was actually called the lotus pattern.

I'm especially in love with the teapots and kettles.

Here's my page with a little bit about the name Lotus, my grandma, and little bits of things I have collected ... a tag from some lotus tea, a lotus postage stamp, and a fun Amy Butler lotus felt flower and button. I used paper cut-outs for my white pattern along the top.

All right, soulies - be sure to play along this week and post links to your projects here or in our Flickr group!

The winner will receive an awesome prize package from Amy's Attic, including a vintage book, paint, brush, vintage buttons, lace, trims, flowers, sheet music, book pages, tags, library pocket, stamps, cards and chipboard!

And our winner from our last fun photography challenge is Robin Stedem!

(Just check these out - unbelievable!)

She did such a fabulous job taking some very cool shots of her kids and their friends, and totally knocked our socks off. So Robin - email your address to kim [at!] smithdata.com and she'll send you your fabulous prize! Thanks so much for sharing your wonderful photos with us.

Friday, November 7, 2008

dancin' in the street!


This weeks challenge, is inspired straight from the pages of Vogue, and our good friend, Twiggy!


I read an article once about how the fashion industry has gotten really serious, and how back in the 60’s it was more free and fun and experimental. I completely agree! I think the atmosphere around shoots and style lacks that playful attitude it used to. So, this week I’m asking you to grab a few friends and have a photoshoot!


When I’m out with my friends, in town, or waiting for a film to start- we sometimes find a cool wall and just take pictures. It’s one of my favourite things about going out now- because I know they are all up for it. But it wasn’t always that way, and I still have friends who don’t like their picture taken, but here’s some tips on getting comfortable.

-Find a spot that isn’t on a busy road. A lot of people don’t like to be looked at when they are being silly.
-Pass the camera around. Don’t hog it! I’m sure your friends want to play photographer too. It will only take a few seconds to show them which is the shutter button, and you might be surprized at how creative they can be! (if you have an SLR, set it to auto-focus and I use Av setting, on the lowest number aperture, like 3.5 (this will tell the camera to always use that aperture but change the shutter automatically) so that it doesn’t flash, but auto works well if it’s a little dark.) The people that know me, all know my trusty sidekick, Myles (Canon EOS 400D) and he has sometimes become more popular than me! I have people at gigs and parties and sometimes just at school asking if they can play with Myles. It’s cute, I like it.
-And tell them to get trigger happy! The more photos you have, the better chance of getting one you’ll all love!
-Volunteer to go first. Get yourself in front of the camera first, and do really silly things. Pull a stupid face or jump around. It will get you all giggling and lighten the mood, plus get everyone comfortable with being goofy. This is also a great way to get some photos of yourself, in a way you might not expect. I’ve been pleasantly surprized on numerous occasions.
-Drag someone into the frame with you. Interact and go over-the-top with your poses!
-Turn the camera on someone next to you. If you have more than one camera, getting the candid shots of someone laughing are always good.
-GET CLOSE! Full body poses are great, but getting up-close and personal is bound to be funny too. Snarl, bite your lip or look confused, fill that frame with your funny face!
-Show them the images afterwards. Laugh at them all and tell them how beautiful they look. (because you know they do!)

On choosing locations;
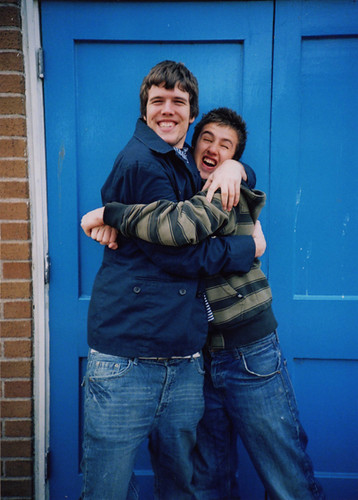
- the less busy it is, the more your subject will stand out. A simple painted door or brick wall are classic favourites. Here are some examples, so you know what i mean;


but when I’ve been pressed for time I’ve shot in front of a metal grate of a closed shop window, or even out in the street.

if you want to see some more examples, click here.

On Hair and Make-up;
- don’t worry about it! The most important thing is the expressions and the relationship you have with your friends. Although, if you plan ahead you could get some cute matching outfits going on!

Looking through my photographs of these types of days, I seem to always make the same faces and poses, but I’ve recently found that old clothes patterns have hilarious poses on them, and I’d quite like to try some of these.


SO- we want to see your best shots! And we don’t mind if you just want to upload pictures or if you want to scrap some or all of them! Have fun with it, and remember to be a little bit stupid in front of the camera!

And now, for our very first ever super spectacular Guest Designer reveal. You may have heard of her...

Ms. Kara Haupt!

Yeah, we know. We really like to start things off with a bang! (And yes, she is our Twiggy muse! Isn't this photo absolutely beautiful?)

Kara is the mastermind behind The Art is Found. Her innovative style has made her a stand-out in the ever evolving world of scrapbooking. And her amazing photography is equally inspiring! What can we say - we just love this girl.

So here she is!

"When Kim first asked me to GD, I was totally thrilled. Work Your Soul is pretty much the coolest concept out there and I love this little blog! I was even more thrilled when she introduced the idea of Twiggy being our inspiration. I had such an awesome time researching Twiggy's fabulousness and was inspired to do a fun little Twiggy self portrait shoot. Taking the "wall pictures" was amazing. I grabbed my bestie, Stephanie, and we totally dorked it up in front of the tripod. Have fun with this prompt! And go crazy! Happy Weekend!!"


And now for Kim's ultra hip photo lovelies. (Note her exceptional ability to capture the little conversations and laughter and goofiness... the girl has skills.)


i finally got around to editing a bunch of great shoots i did with some friends while i was in america.


but i'm soo inspired by what jen did, i might just have to go scrapbook a whole stack of these now!

seriously folks! now THIS is how it's done;


Jen took some AMAZING photos using all sorts of nifty poses&props! i am so jealous of these photos- seriously!

& the winner of our postcard challenge is JOYCE!

you did a great job! we love it! congrats! if you e-mail jen (jgeigley[at]gmail[dot].com) then she'll send your prize out!